Quick overview
What to learn first in Procreate
- Use the wrench menu to understand canvas settings, exports, guides, and preferences.
- Set up drawing guides, reference, Animation Assist, and canvas information.
- Adjust brush feedback, Apple Pencil cursor behavior, pressure, and smoothing.
- Build speed with gestures, QuickShape, eyedropper, and copy-paste shortcuts.
- Use layers, masks, reference layers, groups, and clipping masks to stay editable.
- Procreate beginner settings and gestures to keep nearby.
Procreate is approachable because you can open a canvas and start drawing almost immediately. The tricky part is that many of the features that make Procreate powerful are hidden behind small icons, gestures, and menus that beginners may not know to look for. If you learn those early, the app feels much less mysterious.
This guide focuses on the parts of Procreate that affect almost every drawing session: canvas setup, brushes, gestures, selections, layers, masks, and the shortcuts that keep the app from feeling menu-heavy.
Settings to keep nearby
Procreate beginner settings and gestures
These are the beginner tools, gestures, and menu locations from the video that are worth remembering while learning Procreate.
- Canvas info
- Use
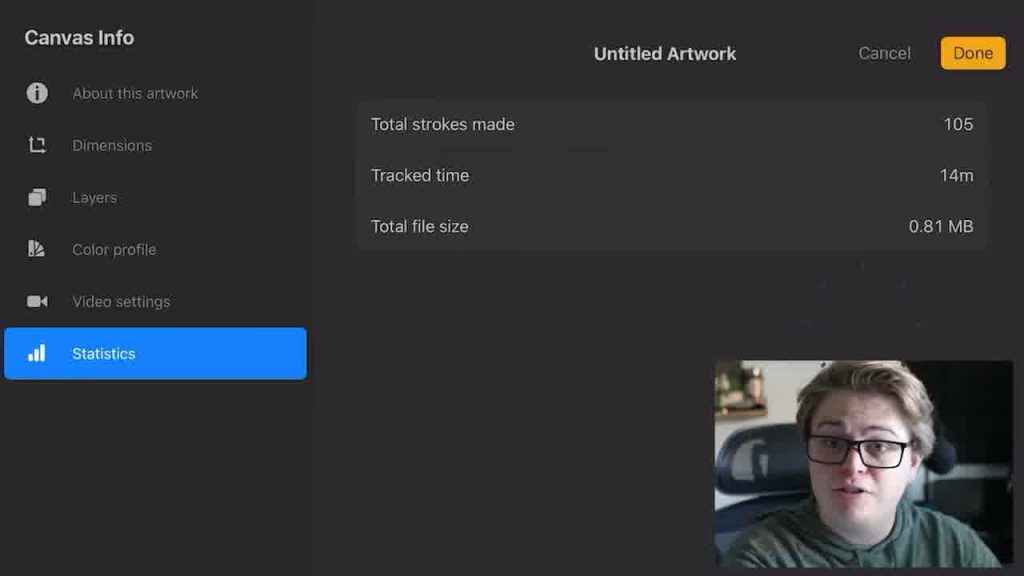
Wrench > Canvas > Canvas Informationto check dimensions, color profile, video settings, statistics, layer limits, tracked time, and file size. - Drawing guides
- Use
Wrench > Canvas > Drawing Guidefor grids, perspective, symmetry, and Assisted Drawing. New layers may need Drawing Assist enabled separately. - Reference view
- Use
Wrench > Canvas > Referenceto keep a full-canvas preview or reference image visible while drawing close up. - Animation Assist
- Use
Wrench > Canvas > Animation Assistwhen you want frame-by-frame animation controls directly under the canvas. - Brush cursor
- Use
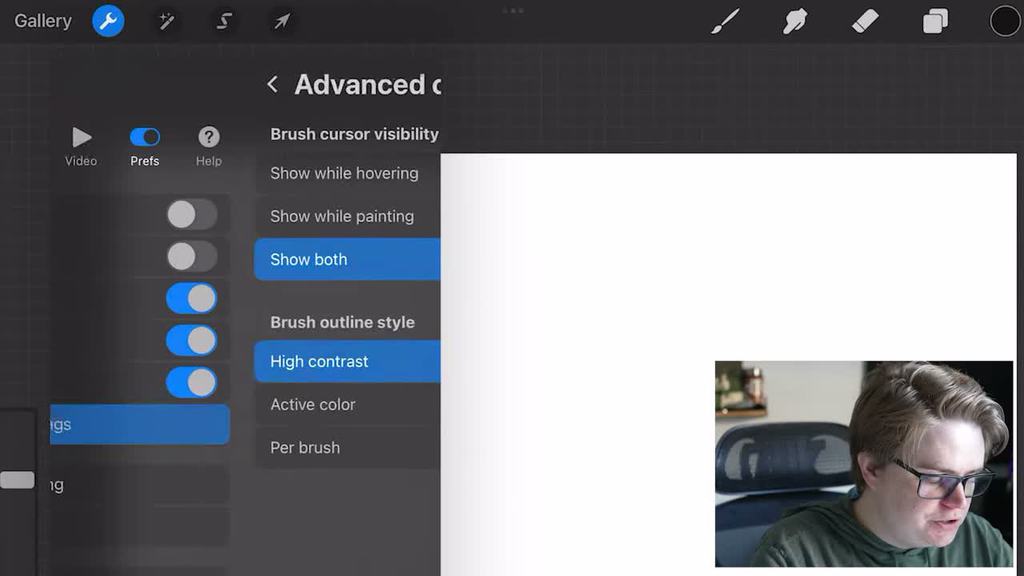
Wrench > Preferences > Brush cursorand Advanced Cursor Visibility to control when the brush outline appears during hover or painting. - Pressure and smoothing
- Leave the defaults alone at first unless your stylus feels wrong. Stabilization, Motion Filtering, and the pressure curve affect the feel of every brush.
- Eyedropper
- Touch and hold is a useful beginner setting because it lets you sample colors directly from the canvas without opening the color panel.
- Copy and paste
- Use a
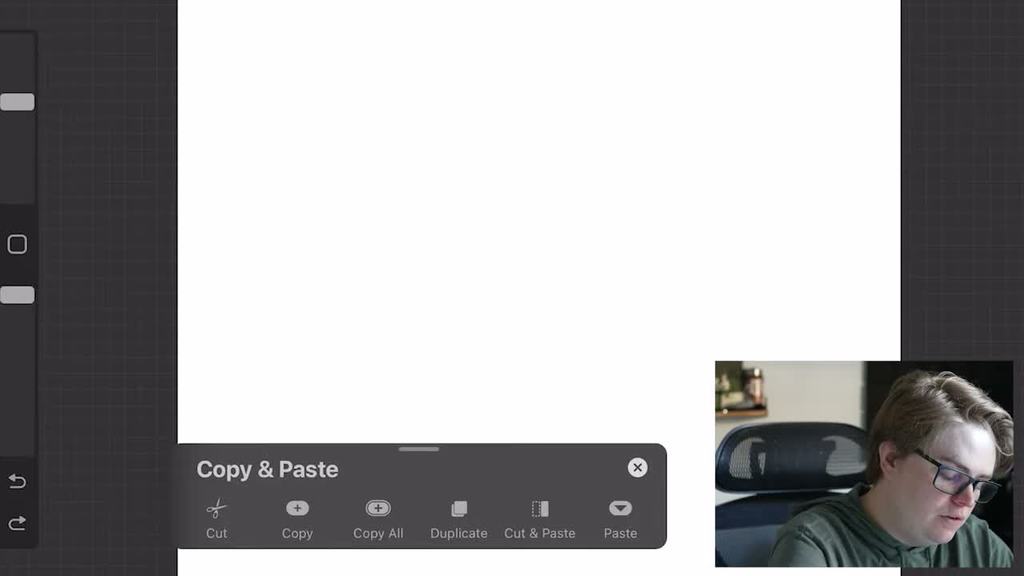
three-finger swipe downto open Cut, Copy, Copy All, Duplicate, Cut and Paste, and Paste. - Layer menu
- Tap a layer name for Rename, Select, Copy, Fill Layer, Alpha Lock, Mask, Invert, Reference, and other layer actions.
- Layer gestures
- Use a
two-finger swipe rightfor Alpha Lock, atwo-finger tapfor opacity, and a pinch across layers to merge them.
1. Start with the wrench menu, not every brush
The wrench icon is where a lot of Procreate beginner workflows begin. It is easy to think of it as a settings drawer, but it is really a control center for the canvas. From here you can add files, insert photos, add text, copy and paste, change canvas behavior, export artwork, replay or export time-lapse video, and customize preferences.
The Add tab is useful when you need to bring outside material into a project, such as reference images, files, pasted artwork, or text. The Canvas tab handles the working environment: canvas information, drawing guides, Animation Assist, reference windows, and flip canvas options. The Share tab is for exporting finished work, while the Video tab controls Procreate’s time-lapse replay and export features.
Beginners often jump straight into brushes, but the wrench menu is what helps you understand the file you are drawing in. If something feels confusing, like why a canvas has fewer layers than expected or where to turn on a perspective grid, this is usually the first place to check.
2. Use canvas information, guides, and reference tools early
Canvas Information is worth checking before you get too deep into a drawing. It can show the dimensions of the artwork, the color profile, time-lapse video settings, statistics, and the layer limits available on that canvas. Layer limits are affected by the canvas size, resolution, and iPad model, so a large high-resolution canvas may give you fewer layers than a smaller sketch file.
Drawing Guide is another beginner-friendly feature that can become advanced quickly. A simple grid can help with alignment, but the more useful options are perspective and symmetry. Perspective guides let you tap to place a vanishing point, then use Assisted Drawing to lock strokes to that perspective. Symmetry can mirror strokes horizontally, vertically, in quadrants, or radially, which is helpful for icons, faces, ornaments, and decorative layouts.
Reference is useful when you want to see the entire canvas while zoomed in, or when you want an image nearby without placing it directly into your artwork. Animation Assist is also in this area. Even if you are not animating yet, it is worth knowing where it lives because it turns Procreate into a simple frame-by-frame animation workspace when needed.
3. Learn brush feedback and Apple Pencil behavior together
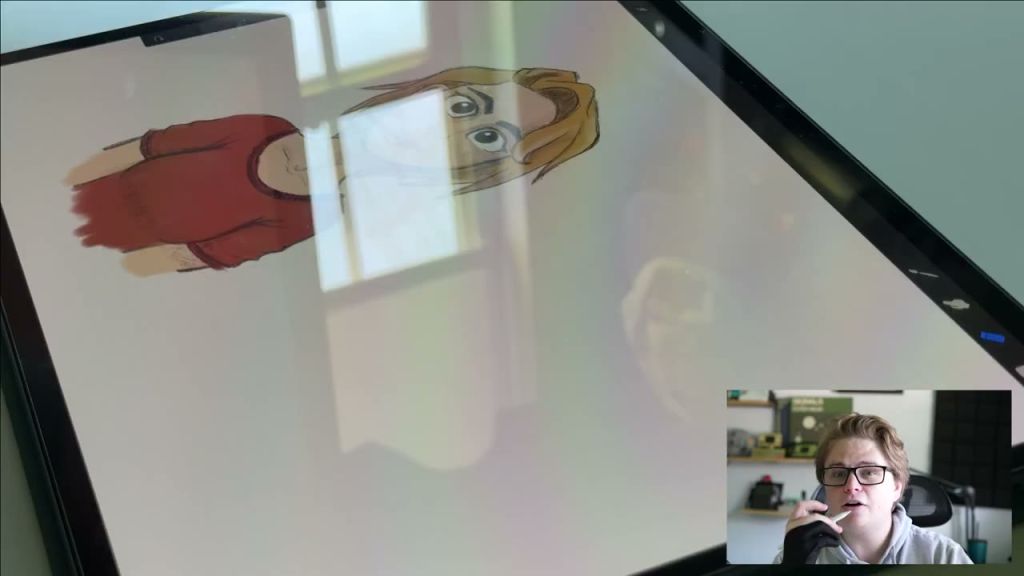
A brush preset is only one part of how the tool behaves. Size, opacity, pressure, stabilization, Apple Pencil settings, and sometimes hover also change the mark. If a brush is hard to control, check those settings before replacing it.
In Preferences, the light interface and right-hand interface options change the overall workspace. Dynamic brush scaling changes how brushes respond while zooming. Project Canvas is useful when an iPad is connected to a second display because it can show the canvas on the external screen instead of mirroring the whole interface.
Brush Cursor and Advanced Cursor Visibility matter most on newer iPads and Apple Pencil models with hover support, but they can still affect how brush feedback feels. Seeing the brush outline before or while painting can help you predict mark size, especially with soft brushes, large texture brushes, or detail work. Pressure and Smoothing settings are usually best left alone at first, but they are worth knowing about. Stabilization smooths lines, Motion Filtering affects larger fast movements, and the pressure curve changes how quickly your Pencil moves from light to heavy marks.
4. Customize gestures so common actions stay close
Gesture Controls are one of the fastest ways to make Procreate feel more natural. They let you decide how touch, Pencil, taps, holds, and swipes interact with tools like Smudge, Erase, Assisted Drawing, Eyedropper, QuickShape, and Copy and Paste. You do not need to customize everything immediately, but you should know that the controls exist.
The Eyedropper is a good example. When Touch and Hold is enabled under Actions > Prefs > Gesture Controls > Eyedropper, you can press the canvas with a finger, sample a color, and keep drawing without opening the color panel. QuickShape is another useful shortcut: draw a line, circle, square, or simple shape, then hold at the end of the stroke to clean it up. In the video, I use the on-screen Modify button as a faster way to trigger QuickShape while drawing.
Copy and Paste is especially useful once you start combining gestures with selections. By default, a three-finger swipe down opens the Copy and Paste menu. From there you can cut, copy, copy all, duplicate, paste, or use Cut and Paste to split selected artwork onto a new layer. That single menu can save a lot of redrawing when you need to move or separate part of a sketch.
5. Use selections when you do not want to redraw everything
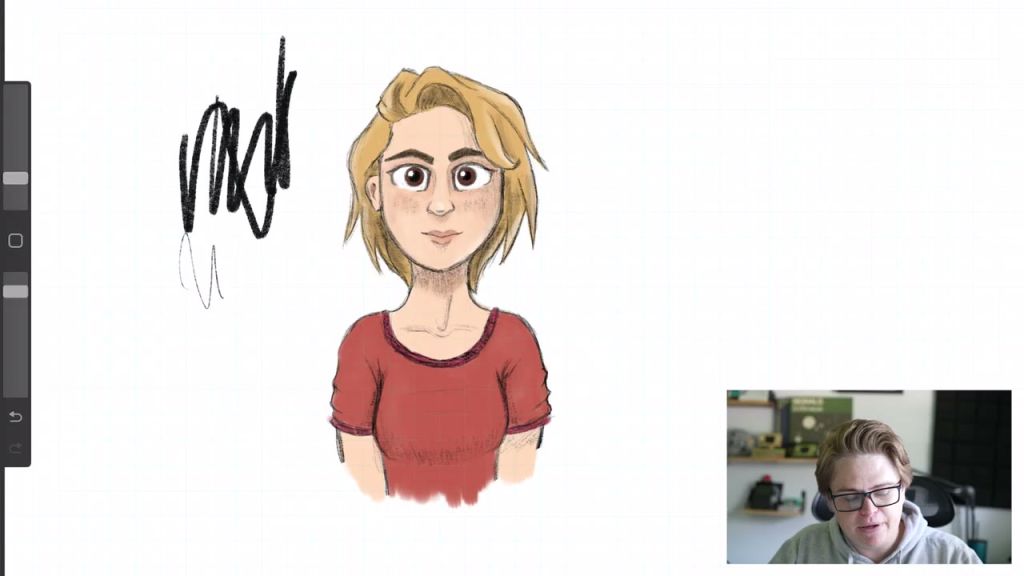
The Selection tool is one of the most useful beginner tools because it lets you change part of a drawing without affecting the entire layer. If you have two shapes on one layer and only want to move one of them, make a selection first, then use copy, cut, transform, or duplicate actions on that selected area.
Cut and Paste is particularly helpful for cleaning up messy layer organization. It may look like nothing happened at first because the selected artwork stays visually in place, but Procreate creates a new layer for the cut piece. That means you can separate two objects after the fact, then move, transform, hide, or edit them independently.
This is one of those features that saves beginners from starting over. If a mouth, arm, sketch element, or color block is in the wrong place, you may not need to erase it. Select it, cut or copy it, place it on a new layer, and keep going.

6. Build layer habits before your files get complicated
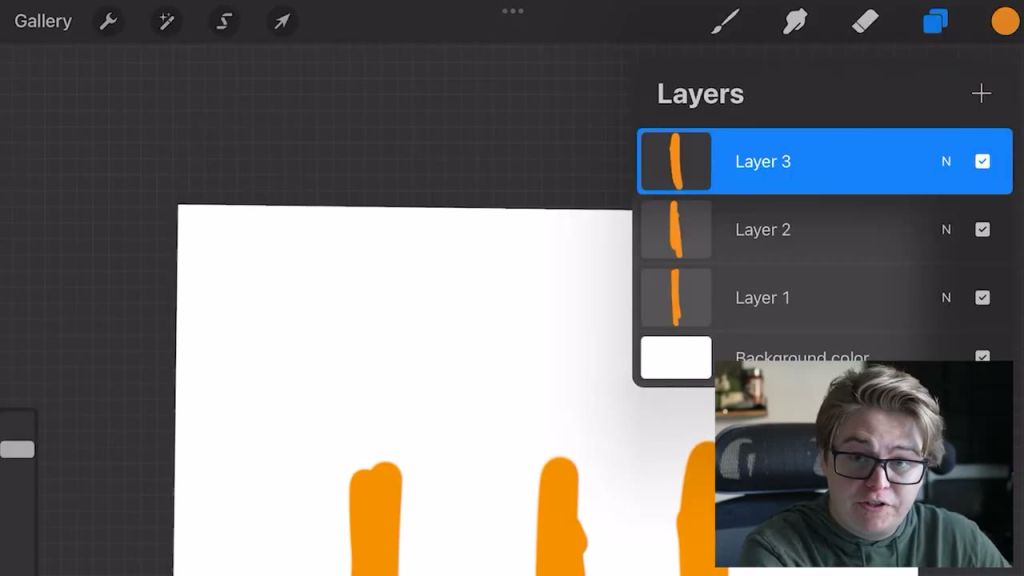
Layers are the backbone of a clean Procreate workflow. Tap the stacked-square icon to open the layer panel. The background color sits at the bottom, checkboxes hide and show layers, and the N opens blend modes and opacity. Tapping a layer name gives you options like Rename, Select, Copy, Fill Layer, Alpha Lock, Mask, Invert, and Reference.
Alpha Lock lets you draw only on pixels that already exist on that layer. It is great for recoloring, adding texture, or shading inside an existing shape. A layer mask is different: it lets you hide parts of a layer non-destructively. Reference layers are helpful when line art is on one layer and color is on another, because Procreate can use the line art boundaries while filling color below.
Swipe left on a layer to Lock, Duplicate, or Delete it. Drag layers to reorder them. Swipe right on multiple layers to select them together, then group them for organization. Groups can also be flattened, but do that carefully. Flattening combines the layers, which can be useful for cleanup but removes some editability.
7. Learn the layer gestures that prevent menu fatigue
Once layers make sense, gestures make them faster. A two-finger swipe right on a layer toggles Alpha Lock. A two-finger tap on a layer brings up opacity controls so you can fade a sketch or texture without leaving the canvas. Pinching layers together merges them, which is useful when you are intentionally combining work, but risky if you still need the layers separated.
Clipping masks are also worth learning early. A clipping mask is a layer above another layer that only shows where the layer below has pixels. It is useful for adding texture, highlights, shadows, or color variation without permanently changing the base artwork. For beginners, this is one of the easiest ways to experiment while keeping a drawing flexible.
The main habit is simple: separate parts of the drawing when they may need different edits later. Sketches, line art, flat color, shadows, highlights, and texture often deserve their own layers. You can always merge later, but it is much harder to separate everything after it has been flattened.
Choose what to learn next
Do not try to memorize the whole interface. Start with one small drawing and learn the tool that solves the problem in front of you. Keep the sketch, line art, color, and shadows on separate layers, use gestures to remove everyday friction, learn Selection and Transform when artwork needs to move cleanly, then try Animation Assist once those controls feel familiar.
 Video + Guide
Procreate Touch Shortcuts and Gestures: Cheat Sheet
Learn Procreate touch shortcuts for undo, redo, layers, Alpha Lock, and QuickShape, with an illustrated gesture cheat sheet to keep nearby.
Video + Guide
Procreate Touch Shortcuts and Gestures: Cheat Sheet
Learn Procreate touch shortcuts for undo, redo, layers, Alpha Lock, and QuickShape, with an illustrated gesture cheat sheet to keep nearby.
 Video + Guide
How to Use Procreate Selection and Transform Without Blurry Artwork
Use Procreate Selection and Transform to move, resize, distort, and warp artwork. Compare selection modes, interpolation, snapping, and blur fixes.
Video + Guide
How to Use Procreate Selection and Transform Without Blurry Artwork
Use Procreate Selection and Transform to move, resize, distort, and warp artwork. Compare selection modes, interpolation, snapping, and blur fixes.
 Video + Guide
How to Animate in Procreate with Animation Assist
Make a frame-by-frame animation in Procreate with Animation Assist. Set up frames, onion skins, holds, playback, and GIF or video exports.
Video + Guide
How to Animate in Procreate with Animation Assist
Make a frame-by-frame animation in Procreate with Animation Assist. Set up frames, onion skins, holds, playback, and GIF or video exports.
Procreate Beginner Questions
01What should beginners learn first in Procreate?
Start with the wrench menu, canvas information, drawing guides, brush and Apple Pencil settings, gestures, selections, layers, masks, and QuickShape. Those tools show up in almost every Procreate workflow.
02Why does Procreate limit my layers?
Layer limits depend on canvas dimensions, resolution, color settings, and the iPad model. Larger or higher-resolution canvases usually allow fewer layers because they require more memory.
03Is Procreate good for beginners?
Yes. Procreate is beginner-friendly because you can start drawing quickly, but it becomes much easier once you learn the hidden workflow tools like gestures, layers, selections, masks, and canvas guides.
04Do I need to change Procreate pressure and smoothing settings?
Most beginners can leave them alone at first. If your stylus feels too shaky, too stiff, or too sensitive, then experiment with stabilization, motion filtering, and the pressure curve.
05What Procreate gesture should I learn first?
Start with two-finger tap to undo, three-finger tap to redo, pinch and twist to move the canvas, and a quick pinch to reset the view. Those gestures remove the most friction while you are learning to draw.