
Quick overview
The Photoshop masking workflow
- Cut out the object and place it before polishing the edge.
- Use the original photo to rebuild foreground depth.
- Use Select and Mask for edges that are not just hair.
- Edit the layer mask directly and tighten it with Levels.
- Finish the composite with a soft water reflection.
- Photoshop masking shortcuts to keep nearby
1. Cut out the object before you obsess over the edge
The first move is not the fancy one. I started by cutting the rubber duck out of its original background with Photoshop’s Remove Background quick action, then dropped it into the lake photo and scaled it into place.
That placement pass matters more than people give it credit for. If the duck is the wrong size, wrong angle, or floating in the wrong part of the water, a perfect mask will not save it. Get the basic read working first: background photo in the back, duck layer above it, and enough room around the object to judge scale and depth.
Once the object is in the scene, then the edge work has a reason to exist. The goal is not just a clean cutout. The goal is making the cutout feel like it has a place in the photo.

2. Put real foreground detail back in front
The trick that makes this work is the layer order. The original lake photo stays in the back, the duck sits in the middle, and a copied piece of the foreground tree sits in front. That little bit of overlap makes the duck feel tucked into the photograph instead of pasted on top of it.
For the tree, I duplicated the background layer and made a loose selection with the Lasso Tool. It does not need to be a perfect selection yet. It just needs to isolate the foreground area enough that you can turn it into a mask and start refining the real edges.
This is also where composites start to feel less mysterious. You are not always trying to make one perfect object layer. Sometimes you are rebuilding depth with a few simple layers: photo, subject, foreground copy.
3. Use Select and Mask for more than hair
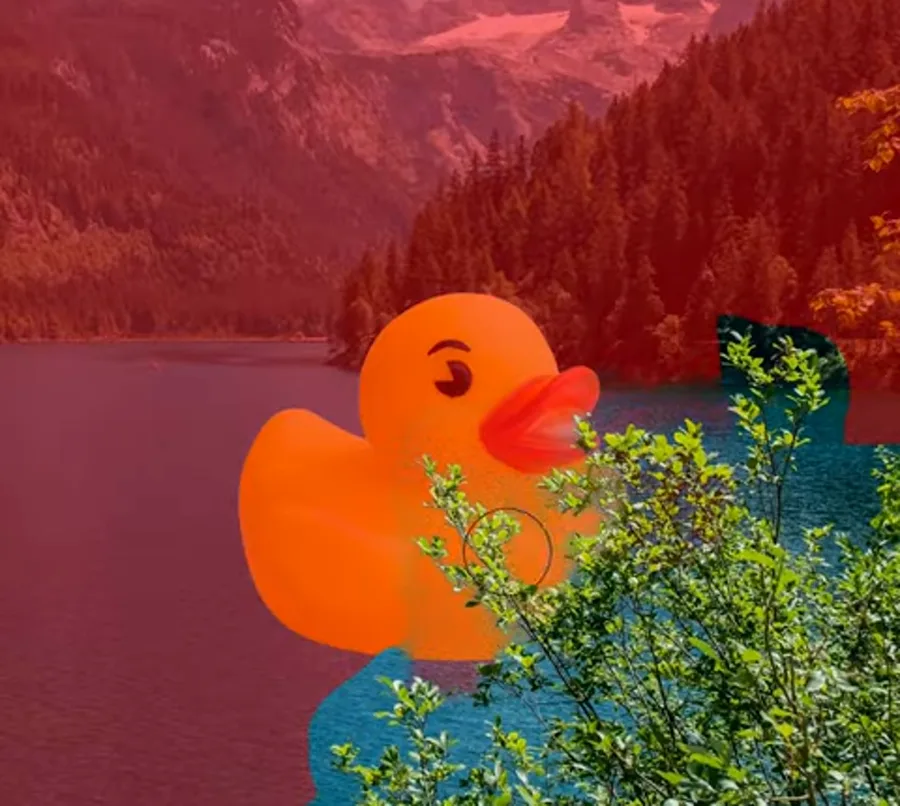
Select and Mask and the Refine Edge Brush get talked about a lot for hair selections, which makes sense, but that is not the only place they help. Tree branches, leaves, fuzzy fabric, fur, and other detailed edges can all benefit from the same idea.
In this composite, the foreground tree is the useful test. A normal hard selection would look too cut out, especially where the leaves overlap the duck. Brushing over the tree edge inside Select and Mask gives Photoshop a chance to separate the small leafy shapes from the lake and duck behind them.
I still treat it as a starting point, not a final answer. Refine Edge can give you better edge information, but it can also leave soft gray mush around detailed areas. That is why the next step is editing the mask itself.
4. Edit the layer mask directly and tighten it with Levels
After the foreground tree has a mask, open the mask view directly. On a Mac, Option-click the layer mask thumbnail. On Windows, use Alt-click. That lets you look at the mask as a black-and-white image instead of guessing from the normal composite view.
From there, select the mask and use Command / Control + L for Levels. This is the clean-up pass I think gets left out of a lot of quick masking tutorials. Levels lets you push the muddy gray edge values closer to true black and white so the mask feels more intentional.
You do have to be careful. Crushing the mask too far can make organic edges look crunchy. The useful version is subtle: remove the haze, keep the real edge character, and make sure the tree still feels like it belongs to the original photo.

5. Add the reflection after the object belongs in the scene
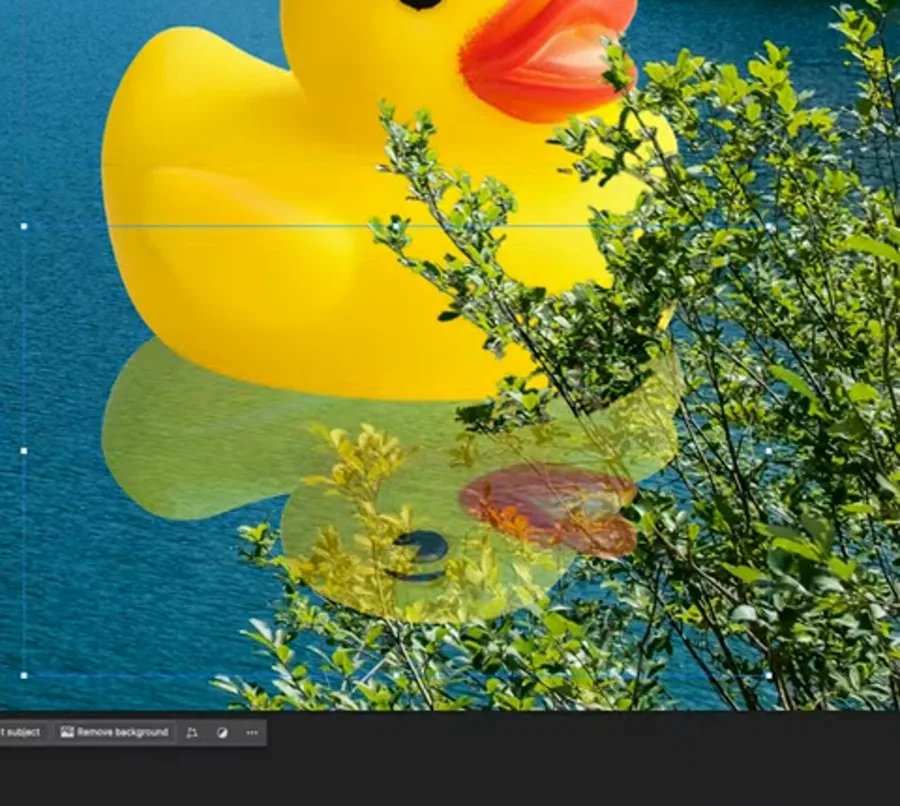
The reflection is a finishing touch, not the thing that makes the composite work. I duplicated the duck, used Edit > Transform > Flip Vertical, squished it down, lowered the opacity, and masked it with a very soft brush so it faded into the lake.
That gives you the basic reflection shape, but a perfect mirrored duck looks too clean for water. A small distortion pass helps. In the short, I used Filter > Distort > Ripple to break up the reflection so it felt a little more connected to the surface.
The reflection does not need to be dramatic. It just needs to support the illusion. If it becomes the first thing you notice, pull the opacity down, soften the mask, or simplify it until it sits back into the photo.
Settings to keep nearby
Photoshop masking shortcuts for this composite
These are the practical Photoshop commands from the workflow. The exact numbers can change from photo to photo, but the order is the important part: place the object, rebuild depth, refine the mask, then polish the reflection.
- Remove Background
- Use
Properties > Quick Actions > Remove Backgroundas a fast starting cutout for the object layer. - Foreground selection
- Duplicate the background layer, make a loose
Lasso Toolselection around the tree or foreground object, and mask that copy above the subject. - Select and Mask
- Use
Select > Select and Mask, then brush over detailed tree edges with theRefine Edge Brush. - View mask directly
Option / Alt + clickthe layer mask thumbnail to edit the black-and-white mask view.- Load mask selection
Command / Control + clickthe layer mask thumbnail when you need the mask as an active selection.- Levels on a mask
- With the mask selected, use
Command / Control + Lto tighten black, white, and gray values in the mask. - Reflection transform
- Duplicate the object layer and use
Edit > Transform > Flip Vertical, then squash, lower opacity, and mask softly. - Water distortion
- Use
Filter > Distort > Ripplelightly so the reflection stops looking like a perfect mirror copy.
Photoshop Object Masking Questions
01Is Refine Edge only for hair selections?
No. Hair is the classic example, but Refine Edge is also useful for trees, leaves, fur, fabric, and other detailed organic edges where a hard selection looks too fake.
02How do you make an object sit behind part of a photo?
Keep the original photo as the background, place the object above it, then duplicate or copy the foreground detail and mask that layer above the object. That creates a simple background, subject, foreground layer stack.
03Why use Levels on a Photoshop mask?
Levels can clean up soft gray areas in a mask by pushing them closer to black or white. It is helpful after Select and Mask when an edge is technically selected but still has haze or feathering.
04How do you make a simple water reflection in Photoshop?
Duplicate the object, flip it vertically, squash it into the water area, lower the opacity, mask it with a soft brush, and add a subtle distortion such as Ripple so it feels less like a perfect mirror.