Quick overview
The path-and-null limb rig
- Draw the limbs as stroked shape paths.
- Set the bend direction before you create nulls.
- Use Points Follow Nulls to make the path animatable.
- Parent custom hands and feet to the endpoint controls.
- Polish the line with strokes, Trim Paths, and Turbulent Displace.
- After Effects limb rig settings to keep nearby.
This quick Le Poisson Steve animation is not a giant character rig. That is the useful part. The limbs are just shape layer paths with strokes on them, and the path points are controlled with nulls using After Effects’ built-in Create Nulls From Paths.jsx script.
That makes the setup feel like a small, scrappy rig instead of a full character animation system. You can draw a bendable arm, attach the path points to null objects, parent the hand to the endpoint control, and animate the nulls like simple limb controls. It is not as powerful as a dedicated rigging tool, but for a five-second character animation tip, it is fast, readable, and surprisingly flexible.
1. Draw the limbs as stroked shape paths
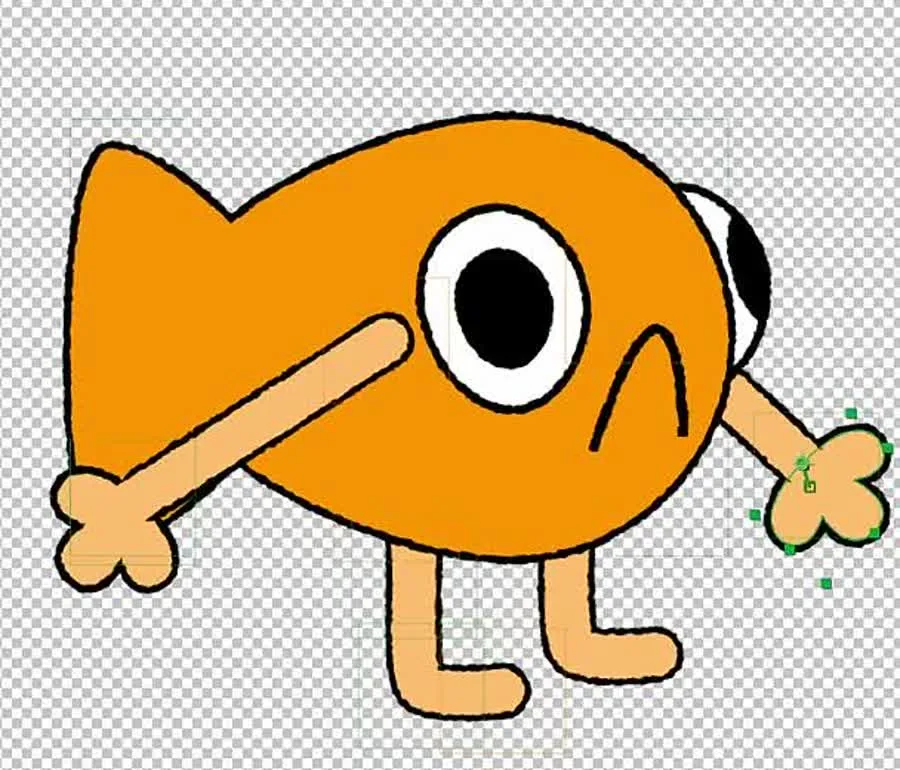
The character itself can stay very simple. Le Poisson Steve is mostly a big body shape, an eye, a mouth, and a few tiny limbs. The important trick is that the arms and legs are not separate Illustrator-style pieces that have to be rotated around like sticks. They are paths with strokes.
In After Effects, make the limb as a shape layer path, then give it a stroke. If you want an arm to bend, keep the path simple: a start point, an endpoint, and enough Bezier handle information to suggest the bend. The cleaner the path is, the easier it is to control once nulls are involved.
This is also why the feet can be extra points on the same path. They do not need to be fancy. For a small character like this, a few simple points can sell the idea of a leg and foot without turning the animation into a miniature anatomy lesson.

2. Set the bend direction before you create nulls
This is the little gotcha that matters: set your path handles before running Points Follow Nulls. Once the path points are connected to null objects, adjusting the handles becomes more annoying because the path is no longer just a normal little line you can freely massage.
For Steve’s arms and legs, the handles establish where the bend wants to go. When the character squats down, the knee can bend in a believable direction instead of folding randomly. You are not building a perfect IK rig here; you are giving the path enough information to behave nicely when the control points move.
I would treat this like a setup pass. Draw the path, pull the handles in the direction you want the limb to bend, test the shape visually, and only then convert those points into null-driven controls. That tiny bit of planning saves a lot of irritated timeline clicking later.
3. Use Points Follow Nulls to make the path animatable
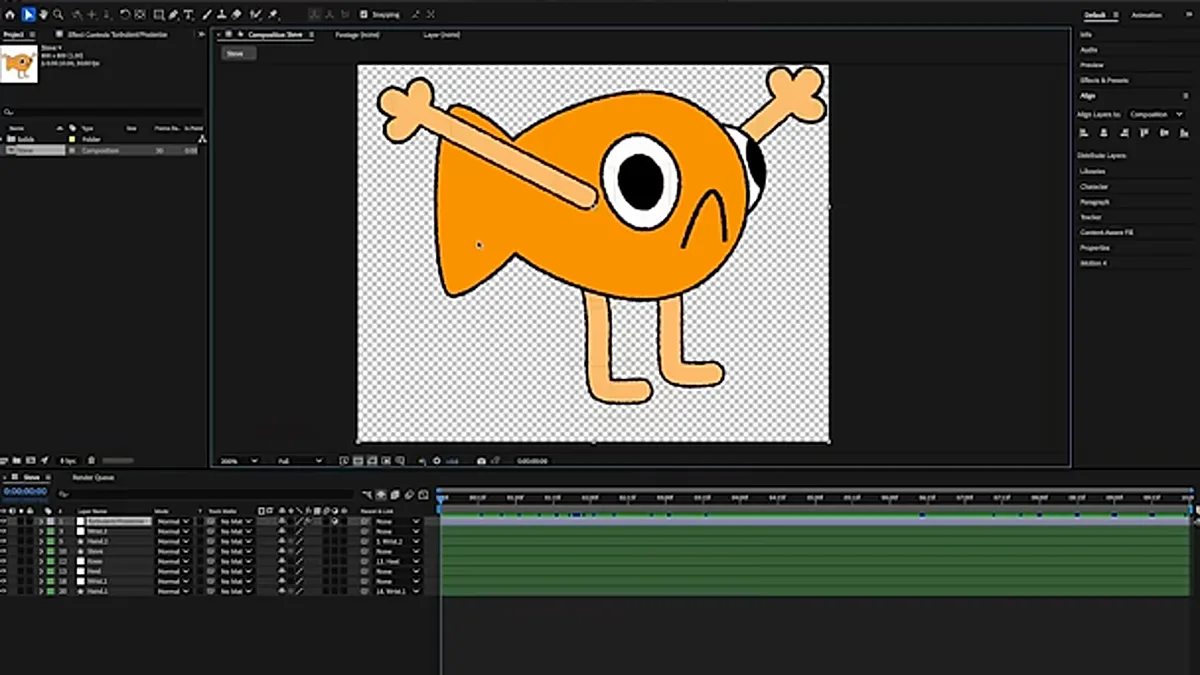
After the path is ready, select the path and open Window > Create Nulls From Paths.jsx. The button you want for this setup is Points Follow Nulls. After Effects creates null objects for the path points, then the path follows those nulls when they move.
That means you can animate the nulls instead of digging into the shape path on every pose. Move the endpoint null and the arm follows. Move the knee or heel point and the leg can squat. It is a very simple kind of rig control, but for short loops and quick character experiments, simple is kind of the whole point.
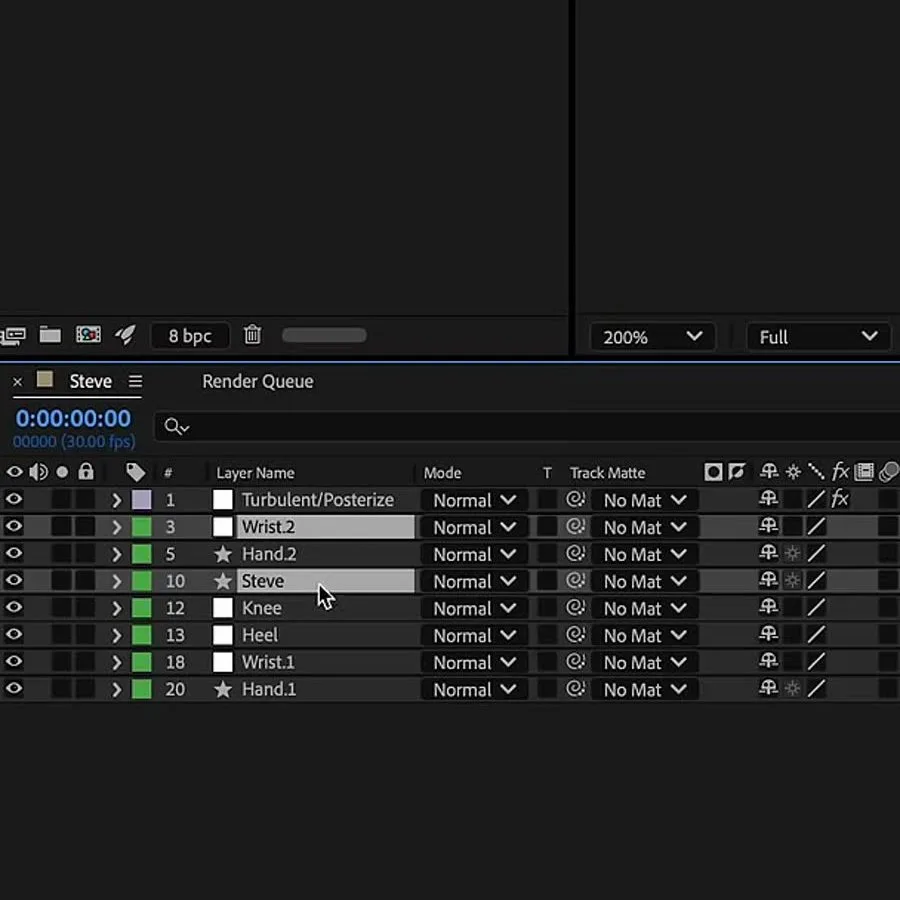
Keep the controls readable in the timeline. Names like Wrist.1, Wrist.2, Knee, and Heel are not glamorous, but they are useful. A tiny character can still become confusing if every control is named Null 47, which is how a fun five-second experiment starts wearing a little business suit.
4. Parent custom hands and feet to the endpoint controls
The hands are separate custom shapes. To keep them attached, parent the hand artwork to the null at the end of the arm, or parent the endpoint null and the hand together in a way that keeps their motion linked. The key idea is that the hand should not need to be chased manually after every arm movement.
Once the hand follows the endpoint, the arm path can bend underneath it while the hand stays visually connected. This is where the setup starts feeling like a tiny rig instead of a pile of separate doodles. You can move the control, the path bends, and the hand comes along for the ride.
For feet, you can keep things even simpler. If the foot shape is just another point or small extension on the path, it can move with the limb without needing a separate piece. Use the least amount of rig you can get away with. That is not laziness; that is respecting future you.
5. Polish the line with strokes, Trim Paths, and Turbulent Displace
The final look comes from a few small shape-layer tricks. I used Turbulent Displace to roughen the outlines slightly so the character feels more hand-drawn and less like a perfectly sterile vector shape. You do not need much. Too much displacement makes the character look like it is melting, which is a different short.
For the limbs, you can add another stroke on the same shape path and make that stroke a little larger for the black outline. Then use Trim Paths to shorten that outline so it does not run all the way into the hand connection. That helps the arm blend into the custom hand shape instead of leaving a chunky black seam at the joint.
That is the whole trick: use path points and nulls for movement, simple parenting for attached pieces, and shape-layer styling for the hand-drawn finish. It is small, fast, and good enough to make a weird little fish squat without having to build an entire rigging system around him.

Here’s the setup
After Effects limb rig settings to keep nearby
These are the practical After Effects pieces from the short. Keep them nearby when you want a quick bendable limb without committing to a full character rig.
- Script panel
- Use
Window > Create Nulls From Paths.jsxto open the built-in path/null tools. - Main button
- Select the shape path and use
Points Follow Nullsso each path point follows a generated null. - Limb build
- Create the limb as a
Shape Layerpath with a visibleStroke, then keep the path as simple as possible. - Bend direction
- Adjust Bezier handles before running
Points Follow Nulls; editing them afterward is possible, but much less pleasant. - Hands and feet
- Parent custom hand artwork to the endpoint null. Feet can be extra path points if the character is simple enough.
- Line polish
- Use a second larger stroke for the outline,
Trim Pathsto hide the outline near the hand connection, and subtleTurbulent Displacefor a hand-drawn edge.
FAQ
After Effects path rig questions
01Can you rig a character in After Effects without Duik or RubberHose?
Yes, for simple movement. Shape layer paths plus Create Nulls From Paths.jsx can give you bendable arms and legs without a dedicated rigging plugin. It is best for small loops, quick experiments, and stylized characters.
02What does Points Follow Nulls do in After Effects?
Points Follow Nulls creates null objects for the selected path points, then makes the path follow those nulls. Instead of animating the path directly, you animate the null positions.
03Should I adjust path handles before or after Points Follow Nulls?
Adjust them before whenever you can. Once the points are following nulls, the path is still editable, but fine-tuning the handles gets fussier. Set the bend direction first, then create the controls.
04How do I keep a hand attached to a shape layer arm?
Parent the hand artwork to the null that controls the end of the arm path. The path can bend as the null moves, and the hand stays attached to the endpoint instead of drifting away.